 Pin It
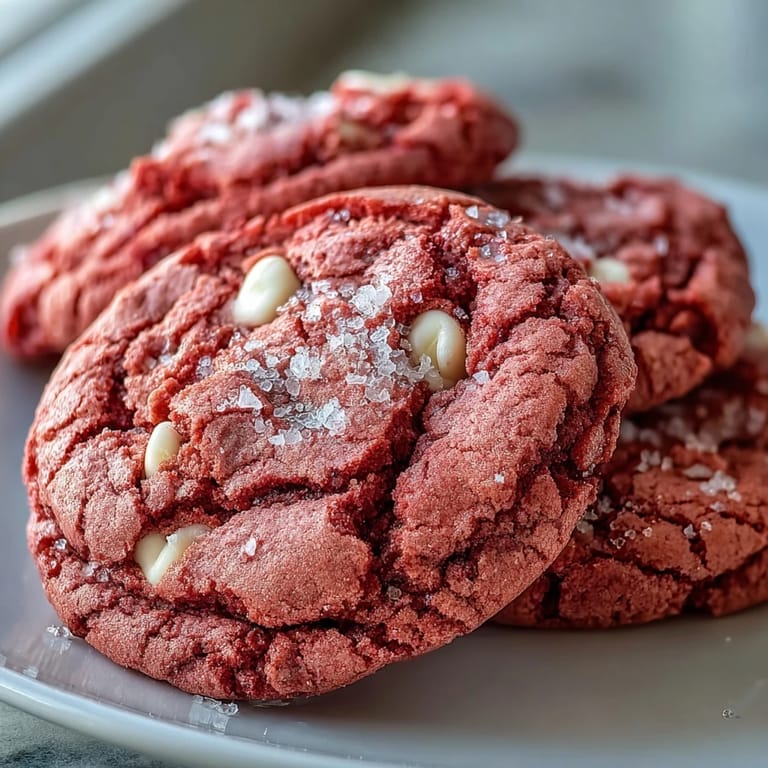
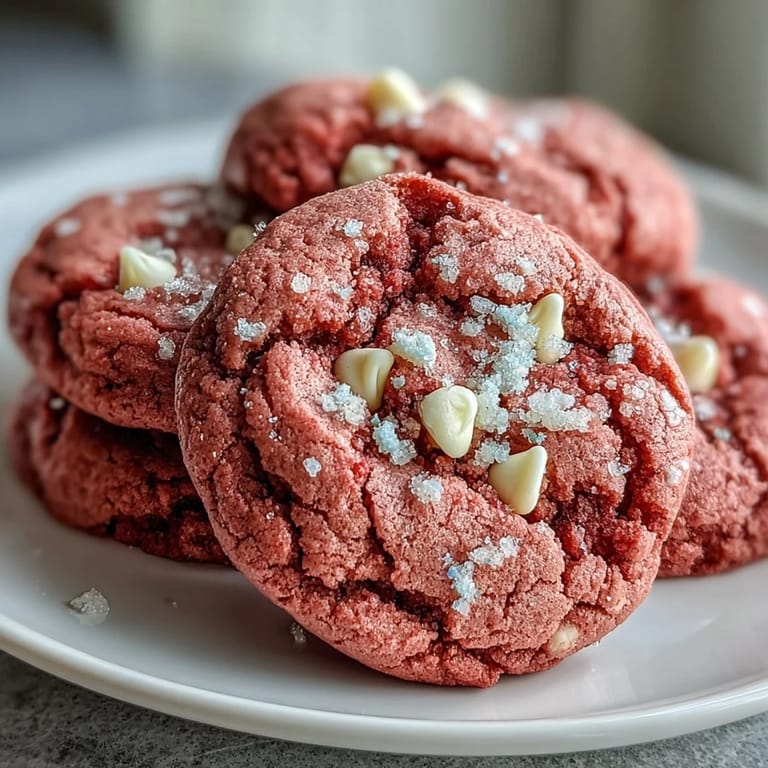
 My daughter walked into the kitchen one Saturday morning and announced she wanted cookies that looked like clouds dipped in sunset. I had no idea what she meant until she showed me a picture of something bright pink and dotted with white. We didnt have a recipe, just an idea and a bottle of gel coloring Id never opened. What came out of the oven that afternoon surprised us both: soft, impossibly pink cookies that tasted like vanilla dreams. Weve been making them ever since, and they never fail to make people smile before they even take a bite.
I brought a batch to a potluck once, stacked in a clear container, and they were gone before I even set down my keys. People kept asking if theyd bought them from a bakery, which made me laugh because Id mixed the dough in my pajamas. One friend told me her kid refused to eat any other cookie for weeks. Its become my go to whenever I want to show up with something that feels special without spending all day in the kitchen.
Ingredients
- All-purpose flour: The structure of the cookie depends on this, so spoon it into your measuring cup and level it off instead of scooping directly from the bag to avoid dense results.
- Baking powder and baking soda: This combo gives the cookies a slight lift while keeping them soft and chewy in the center.
- Salt: Just a half teaspoon sharpens all the sweetness and makes the vanilla sing.
- Unsalted butter: Softened to room temperature, it creams beautifully with the sugar and creates that melt in your mouth texture.
- Granulated sugar: Creaming it with the butter adds air and tenderness, and it dissolves completely for a smooth dough.
- Egg: One large egg binds everything together and adds richness without making the cookies cakey.
- Vanilla extract: Use the real stuff if you can, the warmth it adds is worth every penny.
- Pink gel food coloring: Gel is key here because liquid coloring can throw off the dough consistency, start with a little and add more until you love the shade.
- White chocolate chips: They stay creamy even after baking and create sweet little pockets that contrast with the pink dough.
Tired of Takeout? 🥡
Get 10 meals you can make faster than delivery arrives. Seriously.
One email. No spam. Unsubscribe anytime.
Instructions
- Mix the dry ingredients:
- Whisk the flour, baking powder, baking soda, and salt in a medium bowl until evenly combined. Set it aside while you work on the wet ingredients.
- Cream the butter and sugar:
- Beat the softened butter and sugar together in a large bowl with a hand mixer or stand mixer for about two to three minutes, until the mixture looks pale and fluffy. This step is where the magic starts, so dont rush it.
- Add egg, vanilla, and color:
- Beat in the egg and vanilla extract until smooth, then add the pink gel food coloring. Mix until the color is even and vibrant, adding a little more if you want a bolder pink.
- Combine wet and dry:
- Gradually add the dry ingredients to the wet mixture, mixing on low speed until just combined. Overmixing makes cookies tough, so stop as soon as you dont see streaks of flour.
- Fold in the white chocolate chips:
- Use a spatula to gently fold in the white chocolate chips, making sure theyre evenly distributed throughout the dough.
- Chill the dough:
- Cover the bowl with plastic wrap and refrigerate for thirty minutes. This helps the cookies hold their shape and prevents them from spreading too thin in the oven.
- Preheat and prep:
- Preheat your oven to 350 degrees Fahrenheit and line two baking sheets with parchment paper.
- Scoop and space:
- Use a tablespoon or cookie scoop to form balls of dough and place them two inches apart on the prepared sheets. They will spread a bit, so give them room.
- Bake until just set:
- Bake for ten to twelve minutes, until the edges are set but the centers still look soft. They might seem underbaked, but theyll firm up as they cool and stay chewy inside.
- Cool completely:
- Let the cookies cool on the baking sheets for five minutes, then transfer them to a wire rack. Wait until theyre completely cool before storing or eating, if you can resist.
 Pin It
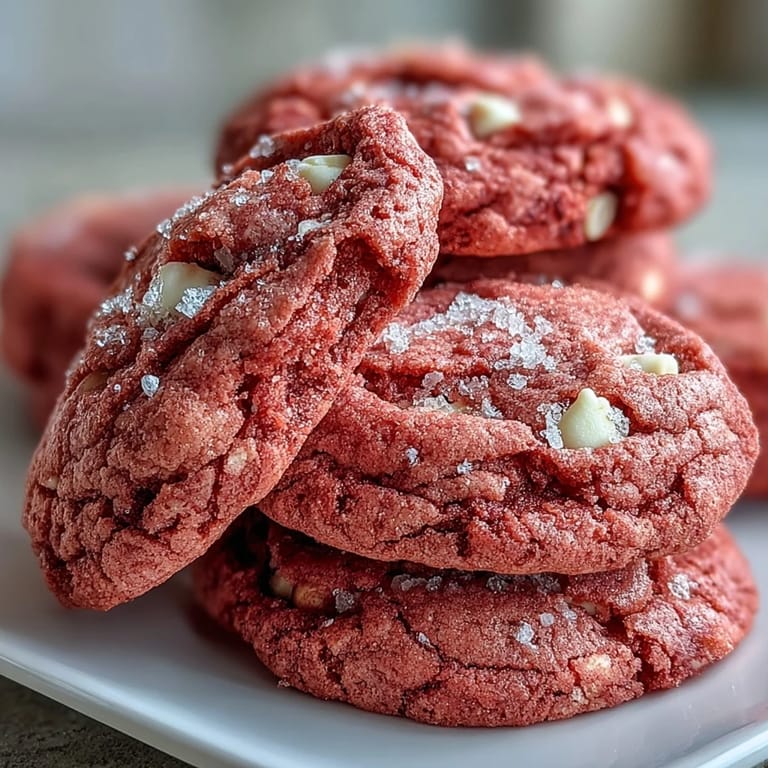
 The first time I made these for a birthday party, a little boy told me they tasted like happiness looked. His mom laughed, but I knew exactly what he meant. Theres something about biting into a cookie this pink and sweet that feels like a small celebration. Now I make them whenever someone needs a pick me up, and I always keep a batch in the freezer for emergencies.
Making Them Your Own
Ive added almond extract before, just half a teaspoon, and it gave the cookies a subtle bakery flavor that people couldnt quite place. A friend of mine tried rose water once and said it made them taste like a fancy French pastry. You can also press a few extra white chocolate chips on top of each dough ball before baking if you want them to look extra pretty. Some people like to make cookie sandwiches by spreading cream cheese frosting between two cooled cookies, and honestly, thats a whole different level of indulgence.
Storage and Freshness
These cookies stay soft for about a week if you keep them in an airtight container at room temperature. I like to tuck a piece of bread in the container, it sounds weird but it keeps them from drying out. You can also freeze the baked cookies for up to three months, just let them thaw at room temperature and theyll taste like you just pulled them from the oven. If you want to freeze the dough instead, scoop it into balls, freeze them on a tray, then transfer to a freezer bag and bake straight from frozen, adding a minute or two to the baking time.
Troubleshooting and Swaps
If your cookies spread too much, your butter was probably too warm or you didnt chill the dough long enough. If theyre too thick and cakey, you might have added too much flour, so make sure youre measuring it correctly by spooning and leveling. For a gluten free version, swap in a one to one gluten free flour blend and the texture should stay pretty close to the original.
- Use parchment paper or a silicone baking mat to prevent sticking and ensure even baking.
- Let your oven preheat fully before baking, a too cool oven will make the cookies spread unevenly.
- If you dont have gel coloring, liquid will work but use it sparingly and expect a lighter shade.
 Pin It
 Theres something quietly joyful about pulling a tray of pink cookies out of the oven and watching peoples faces light up. I hope these become a favorite in your kitchen, too.
Recipe Questions & Answers
- → Why is chilling the dough important?
Chilling for 30 minutes prevents excessive spreading during baking, helping the cookies maintain their shape and texture. It also enhances flavor development and makes the dough easier to scoop.
- → Can I use liquid food coloring instead of gel?
Gel food coloring is recommended because it provides vibrant color without adding excess liquid. Liquid coloring can alter the dough consistency and may require adjusting flour amounts.
- → How do I know when the cookies are done?
The edges should appear set while the centers remain slightly soft. They may look underbaked when removed from the oven but will firm up as they cool on the baking sheet.
- → Can I freeze the dough?
Yes, scoop the dough into balls and freeze on a baking sheet before transferring to an airtight container. Bake from frozen, adding 1-2 extra minutes to the baking time.
- → What makes these different from regular sugar cookies?
The velvet texture comes from the creaming method and higher butter content, creating a softer, chewier consistency. The pink coloring and white chocolate chips add visual appeal and creamy sweetness.
- → How should I store these cookies?
Keep in an airtight container at room temperature for up to one week. For longer storage, freeze baked cookies for up to three months, thawing at room temperature before serving.