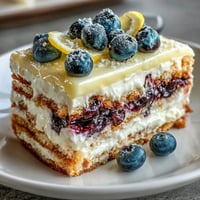
Pin It
 My friend texted me three weeks before her graduation that she wanted something special—a cake that felt as grounded and dependable as she is, with enough elegance to match the occasion. She's a Taurus, stubborn about quality, and I knew immediately this had to be a from-scratch vanilla cake with layers so tender they'd practically melt on your tongue. I'd made plenty of cakes before, but this one felt different, like I was baking a little celebration of who she'd become.
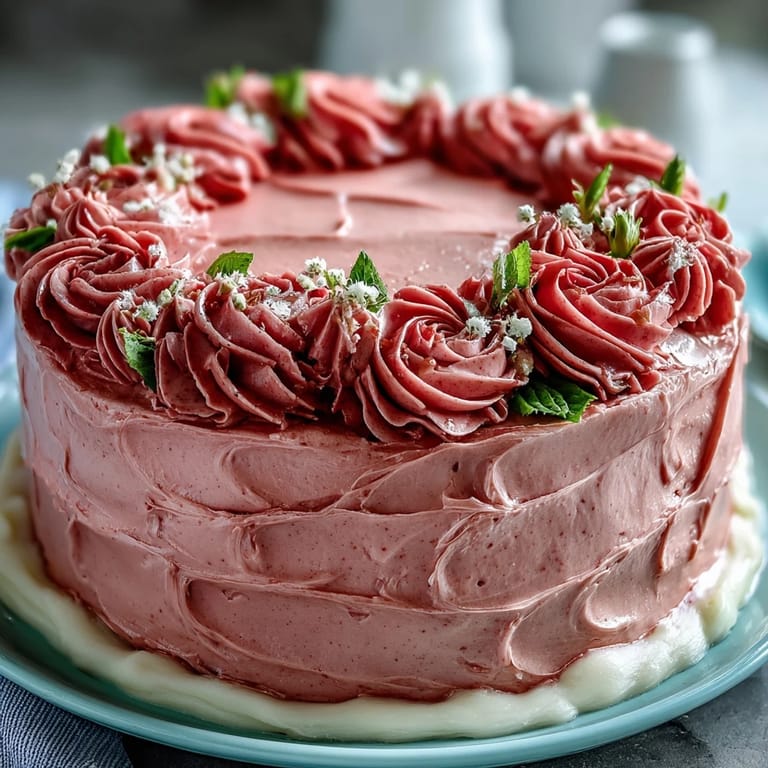
The morning of the party, I piped tiny peonies and lavender sprigs in soft purples and pinks while humming along to whatever playlist was on, and my roommate kept poking her head in asking if it was ready yet. There's something meditative about buttercream piping—each flower is forgiving, each mistake becomes character. By the time I added that gold leaf accent near the top, I felt like I wasn't just decorating a cake, I was marking a moment.
Ingredients
- All-purpose flour: Room temperature flour incorporates more smoothly, so let it sit out while you prep everything else.
- Baking powder: Check the expiration date—stale leavening is the silent killer of otherwise perfect cakes.
- Salt: This tiny amount doesn't make the cake taste salty; it balances the sweetness and deepens the vanilla flavor.
- Unsalted butter: Softened means it should feel almost like butter-flavored clouds—press your finger in and it should leave a gentle indent.
- Granulated sugar: This creams with the butter to trap air, which is why you beat them for a full 3-4 minutes, not just 30 seconds.
- Eggs: Room temperature eggs blend seamlessly into the batter; cold ones create little pockets that never fully incorporate.
- Pure vanilla extract: The real stuff makes a noticeable difference here—the cake will smell like a French patisserie.
- Whole milk: Also room temperature; cold milk can shock the batter and cause curdling.
- Powdered sugar: Sifting it beforehand prevents lumps in your frosting—it's worth those two extra minutes.
- Heavy cream or milk: For the frosting, this adjusts the consistency to exactly what you need without making it grainy.
- Gel food coloring: Use gel, not liquid food coloring, because it won't make your buttercream runny or change the texture.
- Piping tips: Petal tips create realistic flowers; leaf tips give you dimension; round tips work for dots and borders.
Tired of Takeout? 🥡
Get 10 meals you can make faster than delivery arrives. Seriously.
One email. No spam. Unsubscribe anytime.
Instructions
- Prepare your station:
- Preheat the oven to 350°F and grease those three 8-inch pans with parchment paper fitted inside. This setup prevents sticking and makes it easy to turn the layers out cleanly once cooled.
- Mix your dry ingredients:
- Whisk the flour, baking powder, and salt together in a medium bowl. This distributes the leavening evenly throughout, so every bite has the same lift.
- Cream butter and sugar:
- Beat them on medium speed for 3-4 minutes until the mixture looks pale and fluffy, almost mousse-like. You'll actually see the volume increase as you're beating air into it.
- Add eggs one at a time:
- Drop in one egg, beat until combined, then repeat with the others. This gradual approach means each egg fully emulsifies into the mixture instead of curdling.
- Build the batter in three additions:
- Start with a third of the flour mixture, beat until just combined, then a third of the milk, then repeat. Finish with the last flour mixture—overmixing at this stage develops gluten and makes the cake tough.
- Divide and bake:
- Pour batter evenly into the three pans and smooth the tops with a spatula. Bake for 28-35 minutes until a toothpick inserted in the center comes out clean; the edges should pull slightly away from the pan.
- Cool with patience:
- Let cakes cool in the pans for 10 minutes—they're still fragile—then turn them out onto wire racks to cool completely. Trying to frost a warm cake is a recipe for melted frosting sliding everywhere.
- Make your buttercream:
- Beat softened butter on medium speed until it's pale and creamy, then gradually add sifted powdered sugar in batches. Add vanilla and cream, then beat for another 3-4 minutes until it's light and fluffy enough to pipe.
- Color your frosting:
- Divide the buttercream into small bowls and add gel coloring drop by drop, stirring until you reach the shade you want. A little goes a long way with gel coloring.
- Stack your cake:
- Place the first cooled layer on your serving plate, spread a thick layer of buttercream on top, then repeat with the remaining layers. Level any doming with a serrated knife if needed.
- Apply the crumb coat:
- Spread a thin, rough layer of buttercream over the entire cake to seal in crumbs, then chill for 20 minutes. This step prevents crumbs from getting dragged into your final frosting layer.
- Smooth the final coat:
- Apply a thicker, final layer of buttercream and smooth it with an offset spatula dipped in warm water. Take your time here—this is your canvas for the flowers.
- Pipe your floral design:
- Fill piping bags with your colored buttercream and start piping flowers, leaves, and vines wherever your eye feels drawn. There's no wrong way to do this; even imperfect petals look lovely together.
- Add your finishing touch:
- Place gold leaf or sprinkles in a celebratory spot—near the top, around the Taurus symbol, or anywhere that feels right. Chill the finished cake until serving time, then bring it to room temperature for the best slice.
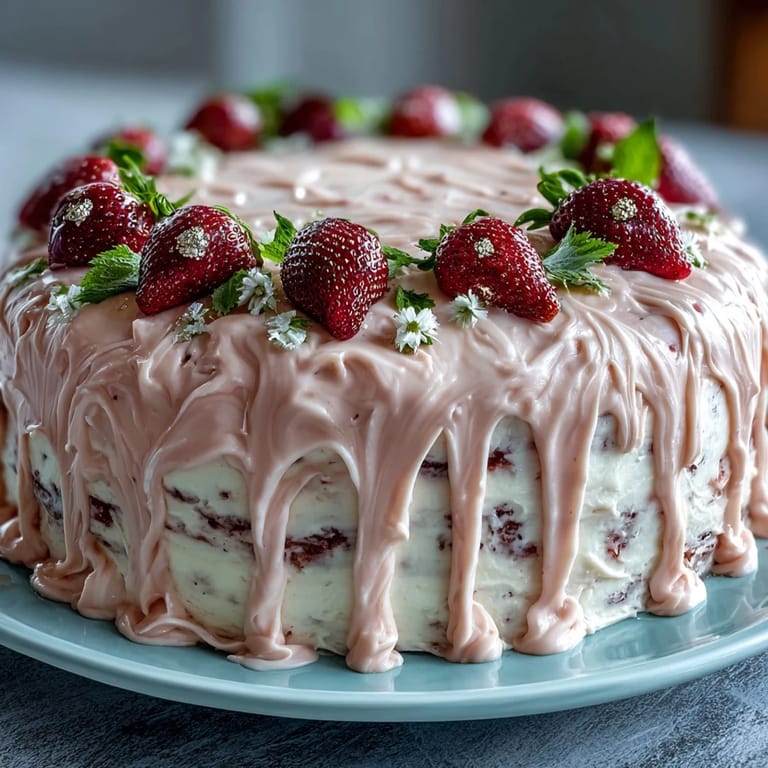 Pin It
 When she cut into that cake at her party, surrounded by people she'd known since elementary school, I watched her face light up at how soft and moist the crumb was. That's the moment cake stops being dessert and becomes a little edible love letter—especially when someone took time to pipe flowers just for you.
The Vanilla Cake Texture Secret
The reason this cake stays tender instead of becoming dense is the balance of technique and ingredients. You're not using oil or extra liquid; you're using butter creamed thoroughly with sugar to incorporate air, which provides lift on its own. The alternating method of adding flour and milk ensures the gluten network stays relaxed while still developing enough structure to hold everything together. I learned this the hard way after making a cake that felt like a brick, and the difference really is in respecting the sequence.
Piping Florals Without Stress
Most people think you need formal training to pipe flowers, but honestly, you just need frosting thick enough to hold shape and a willingness to let flowers look slightly imperfect. Start with your petal tip held at a 45-degree angle, squeeze gently while moving your hand in a spiral motion, and boom—you've got a peony. If it looks wonky, keep piping others around it; a cluster of slightly imperfect flowers actually reads as more charming and organic than a row of identical ones.
Personalizing the Cake for Different Celebrations
This cake works beautifully for graduations, birthdays, engagement parties, or any moment worth celebrating with someone grounded and dependable. You can match the flower colors to school colors, include the graduate's initials, or swap the Taurus symbol for a graduation cap made with gold leaf. The vanilla base is neutral enough to work with any color story, and the floral design feels equally at home at an outdoor spring party or a formal evening event.
- Consider adding 1 teaspoon of almond extract to the batter if the recipient loves that warm, toasted-nut flavor.
- You can pipe flowers onto parchment ahead of time, chill them, and transfer them to the cake if you want a more intricate design without the pressure of piping directly on the frosting.
- If you're nervous about piping, practice on a plate with leftover frosting first—it's surprisingly forgiving once you realize there's no such thing as a piping mistake, just happy accidents.
 Pin It
 This cake is the kind you make when someone's achievement deserves more than a generic store-bought option. It's your way of saying I see you, I'm proud of you, and you're worth the time it takes to get the details right.
Recipe Questions & Answers
- → What makes the buttercream floral design stand out?
The buttercream is tinted with gel colors and piped using specialized tips to create delicate floral patterns, adding vibrant, elegant decoration.
- → Can I personalize flavors in this cake?
Yes, adding almond extract to the batter enhances flavor, and you can adjust the buttercream colors to match any theme or occasion.
- → How do I ensure even cake layers?
Divide batter evenly into pans and smooth the tops before baking. Cool completely and level if necessary for uniform stacking.
- → Are there any allergen considerations?
This cake contains wheat, eggs, milk, and dairy, and may include nut traces if almond extract is added. Always verify ingredients for allergies.
- → What tools are helpful for decorating the cake?
Using piping bags with assorted floral tips and an offset spatula ensures neat application of the buttercream and detailed floral motifs.