 Pin It
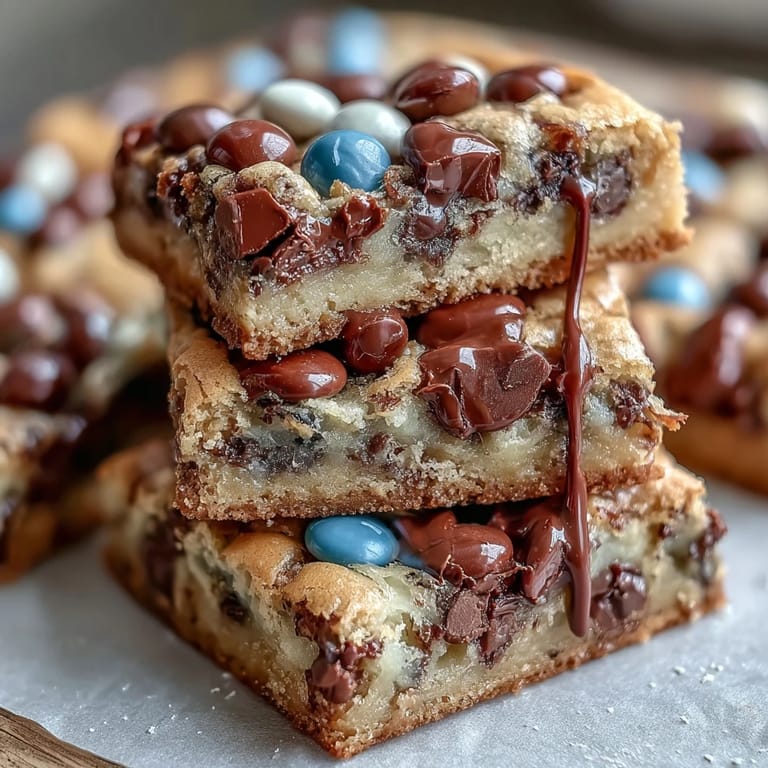
 My neighbor showed up at my kitchen door with a box of graduation cookies from some fancy bakery, and I remember thinking they looked impressive but tasted a bit stiff. That's when I decided these bars needed to exist—the kind that are actually chewy, studded with colors that pop, and topped with that dreamy white chocolate drizzle that makes people pause mid-bite. What started as a "I can do better" moment turned into the recipe I now make whenever someone needs to celebrate.
I'll never forget baking these for my cousin's graduation party on a humid June afternoon, when the kitchen was already warm from the oven. My aunt came in, caught the smell of melting chocolate and butter, and just stood there watching the white chocolate drizzle happen, grinning like she was witnessing something momentous. Food has a funny way of marking time, and these bars somehow felt like edible proof that we were celebrating something real.
Ingredients
- All-purpose flour (2 1/4 cups): This is your structure, keeping the bars from being too cakey, and measuring by weight ensures you won't accidentally pack too much into the measuring cup.
- Baking soda (1 tsp): Just enough to give the bars a subtle lift and that slight tang that makes chocolate taste richer.
- Salt (1/2 tsp): The secret that makes people say "these taste incredible" without realizing it's because salt is doing the heavy lifting behind the scenes.
- Unsalted butter, melted (1 cup): Melt it just until it's pourable but not hot, so it cools down naturally while you're measuring the sugars.
- Packed light brown sugar (1 cup) and granulated sugar (1/2 cup): The combination of both creates that perfect chewy texture; skip either one and you lose the magic.
- Large eggs (2) and vanilla extract (2 tsp): These bind everything and add a subtle sweetness that cream together, not separately, for the smoothest mixture.
- Semi-sweet chocolate chips (1 cup): Use a brand you actually like eating straight from the bag, because that's how you know they'll taste good baked in.
- Colored candy-coated chocolates (1/2 cup): M&Ms are the classic choice, but hunt down school-specific colors to make these feel like a true celebration.
- White chocolate (4 oz) and vegetable oil (1 tsp): The oil prevents the white chocolate from seizing up and getting grainy; it's a small step that makes an enormous difference.
- Optional sprinkles: Add these while the white chocolate is still tacky, or they'll just slide right off.
Tired of Takeout? 🥡
Get 10 meals you can make faster than delivery arrives. Seriously.
One email. No spam. Unsubscribe anytime.
Instructions
- Get your pan ready:
- Preheat to 350°F and line a 9x13-inch pan with parchment paper, leaving some overhang so you can lift the whole thing out later without wrestling with scissors.
- Mix the dry stuff:
- Whisk flour, baking soda, and salt in a medium bowl and set it aside; this distributes the leavening evenly so you don't get surprise pockets of dense dough.
- Combine the wet ingredients:
- In a larger bowl, whisk the melted butter with both sugars until smooth, then add eggs and vanilla and mix until everything is well combined and slightly glossy.
- Gently fold in the flour mixture:
- Add the dry ingredients to the wet ones and fold with a spatula until just incorporated; overmixing develops gluten and makes these tough instead of chewy, which would be a tragedy.
- Add the colors and chocolate:
- Stir in the chocolate chips and candy-coated chocolates last, so they're evenly distributed without getting broken up.
- Spread and smooth:
- Pour the dough into the prepared pan and use an offset spatula or the back of a spoon to spread it evenly into the corners.
- Bake until the edges are golden:
- 23 to 25 minutes is the sweet spot; the center might still look slightly underbaked, which is exactly what you want for chewy bars.
- Cool completely:
- Leave them in the pan on a wire rack until they're room temperature, which takes patience but prevents the white chocolate from melting when you drizzle it.
- Melt the white chocolate gently:
- Use 20-second microwave bursts with a stir between each one, adding that vegetable oil to keep it silky and smooth instead of chunky and seized.
- Drizzle with purpose:
- Use a spoon or piping bag to create those decorative white chocolate lines, then add sprinkles while everything is still tacky.
- Let the drizzle set:
- Give it 10 to 15 minutes before cutting, so the white chocolate hardens slightly and everything stays in place.
- Cut into 16 squares:
- Use the parchment overhang to lift the whole bar out, then cut with a sharp knife, wiping it clean between cuts for neat edges.
 Pin It
 There's something about pulling a pan of these bars out of the oven and knowing they're going to make someone's graduation day a little bit sweeter. These aren't fancy, they're not pretentious, but they taste like someone cared enough to get it right.
Choosing Your Colors
The beauty of these bars is that you can match any school colors, sports team, or theme you're celebrating. I've made blue and gold versions for universities, maroon and white for high schools, and even rainbow versions just because it felt festive. The colored candies are the easiest way to customize without changing the recipe at all.
Make-Ahead Magic
You can bake these bars the day before and store them in an airtight container, which actually lets the flavors settle and meld together even better. The morning of your event, all you need to do is melt the white chocolate and drizzle, which takes maybe five minutes and makes your kitchen smell incredible.
Storage and Serving Tips
Keep these in an airtight container at room temperature for up to four days, though they usually disappear much faster than that. They travel well in boxes for parties, cut cleanly when you use a sharp knife, and look impressive stacked on a dessert table.
- If you're stacking them for transport, place parchment between layers so the white chocolate drizzle doesn't stick to the next bar.
- Bring them to room temperature before serving if you've kept them in a cool spot, so the chocolate hits that perfect texture.
- Double-check any nut allergies before using certain branded chocolates, as some facilities share equipment with nuts.
 Pin It
 These bars exist at the intersection of easy and impressive, which makes them perfect for moments that deserve celebrating. Every time you make them, you're creating something that tastes like pride in someone's accomplishment.
Recipe Questions & Answers
- → How do I prevent overmixing the batter?
Mix the dry ingredients into the wet just until combined to keep the bars tender and chewy.
- → Can I substitute the candy-coated chocolates?
Yes, dark or milk chocolate chips work well as alternatives for the candy pieces.
- → What is the best way to melt the white chocolate?
Use short 20-second intervals in the microwave, stirring in between until smooth to avoid burning.
- → How do I store the bars to keep them fresh?
Keep the bars in an airtight container at room temperature for up to four days.
- → Can the bars be made ahead of time?
Yes, prepare and drizzle in advance, then store properly to enjoy later.
- → How can I customize the bars for a theme?
Use candy-coated chocolates and sprinkles in colors that match the event or school colors.